First go to her website lizziekate.com and print off the egg template.

After printing it gather up your supplies comic board, fabric quilt batting, trim and cording.

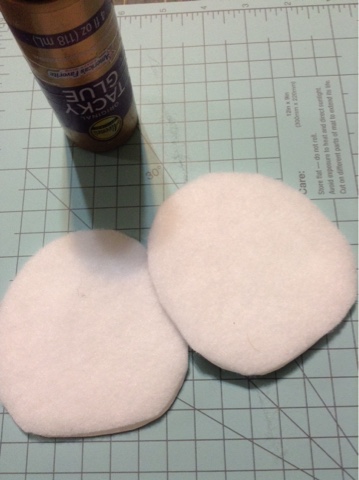
Cut two egg shapes from the comic board. Mark the insides with an X


Now cover the two outsides with low loft quilt batting. Trim flush with the edges.
Now take your backing fabric and trim it about 3/4 inch from the edge of the form

Start gluing fabric to the back of the template. I like to do top, bottom, side, side first.

Then gently gather and glue the sections between. If you get a fold lift it up and try again.

Check to make sure everything is nice and smooth on the opposite side

Repeat with the stitched linen.....spend time getting centered and straight. Us a few straight pins to keep it in place while gluing.

We used Peony Ric Rack by Lady Dot. Fold down the raw edge and then glue around the outside edge.

Once you make it around to the top, fold down the edge and then add the hanger. I use twisted cord but jute, ribbon or nbaby Rick rack would also work.

Now give a good dose of glue on the bottom half of the Rick rack and along the inside edge.

Center stitching in top and use clips to make good contact along the edges.

Let dry....and your egg will looks egg-actually like the model....no yoke!


Thank you Mona for the clear explanation. Especially for the rick rack. It is very cute egg in this colors!
ReplyDeleteXxX Hetti
I love your finishing tutorials. I do have a question about the clamps you are using, don't you find they leave indents in the fabric on the finished item? I have had indentations from wonder clips,and am wondering how to avoid this. Thanks Mona!
ReplyDeleteHi Suzanne,
DeleteThanks for the question...the key is not to leave them on very long. You might even put a piece of felt under the clip part. Most glues set up in just a few minutes. Second option is match up the two pieces and place a heavy book on top.
Great tutorial! Thanks for sharing :)
ReplyDeleteIs comic board the same as mat board? Could you use that instead?
ReplyDeleteHi Susan,
ReplyDeleteThanks for the question....comic board is lighter than mat board. Perfect for small projects and much, much, much easier to cut.
M
Thank you so much for sharing this finishing technique!
ReplyDeleteThank you so much for sharing this finishing technique!
ReplyDeleteI have got the good information through your blog; I will share this to my friends as well.
This post is much helpful for us.thanks.
ReplyDeleteบาคาร่า
gclub จีคลับ
gclub casino
The egg look great. the craftsmanship is amazing.
ReplyDeletecheap brian regan tickets
discount brian regan tickets
Oh, this looks pretty great. I love the colors of the picture.
ReplyDeletecheap Luton airport parking
Luton airport cheap parking
เลเซอร์หน้าใส เป็นอีกหนึ่งสิ่งใหม่ทางความสวยที่ช่วยฟื้นฟูผิวหนังที่แห้งกระด้าง บริเวณใบหน้าหมองคล้ำให้กลับมาผ่องใสมองเบิกบานใจ ผ่องใสภายในช่วงเวลาอันเร็วทันใจ นับว่าเป็นทางลัดความงดงามที่กำลังเป็นที่นิยมสูง ช่วยรับใช้ผิวให้ขาวกระจ่างขาวใส จากการลดลางเลือนริ้วรอยจุดด่างดำได้อย่างมีคุณภาพ
ReplyDeleteเลเซอร์หน้าใส
เลเซอร์ลดริ้วรอย
เลเซอร์รอยสิว