Sunday, July 23, 2017

Cruise Pyn Pillow

Gather together your pillow supplies


First thing we will do is interface the back of the stitching...trim it to fit inside the back stitching.  Use a thick towel on your ironing board so you won't flatten your stitches.  


Trim linen 14 threads (1/2 inch) on all four sides.


Trim is centered between the top and bottom stitched areas.  There is no right or wrong top so sew it the way you want.  I just took a few stitches along the lacy areas to keep it in place.  Then sew the buttons along the trim....of if you found lace and or buttons on our trip you would rather use...do it!


Fold back the edges where the back stitching is on top of the fold on all four sides. Miter corners--I like to tack the folds and baste down the edges.  I find it makes sewing the linen to the backing easier.


Now place the linen right side up on the wool backing.  Start sewing about 3/4 inch from the bottom right corner.  Backing will be larger than the stitching.  Align the bottom and right hand side.


Sew using green thread.  Pick up the back stitching and catch enough of the wool to make a good connection...about 1/8 inch from the cut edge of the wool.  Continue until you make it to the top of the right side....then trim wool to match top and left side of the linen...finish stitching around the outside edges leaving about two inches unsewn at the bottom.


Use the bottom opening to "LIGHTLY" stuff the pillow.  Do not put too much pressure on the outside seam.  After corners and body is stuffed finish sewing up the bottom seam....but...leave about 1/4 inch open.  This opening will be where you start and stop your chenille trim.


Place one end of the trim in the hole...I like to use a wooden skewer to poke it in....and couch the trim around the edge using matching thread.  


When trim is sewn around...use the same back stitching to anchor your stitches...cut the trim leaving about one inch and use the skewer to poke it into the opening.


Once everything is done you can use a needle to fluff up the trim if it has been trapped by the crouching....another easy fun away to finish smalls!!


I loved our cruise projects and can't wait to see what Jeannette comes up for our Amsterdam Adventure!!  I'm already counting the days.

Tuesday, July 4, 2017

Rolling Down the Rhone.....

A little less than a month ago we completed yet another "trip of a lifetime".  This time we traveled to Paris for three days and absorbed the culture, sights, and food.  My favorite was a delightful lemon tart. 

In honor of our Paris adventures Jeannette provided us with a little Eiffel Tower piece which I made into a petite cube.  Here is a refresher of our shipboard class....

Pieces needed....


 First sew the ends together on the long rectangle....you will use the gray thread provided in your kit.

Hide your knot on the back.

Sew along the two edges. Pick a little fabric from each edge.  Every third stitch go through the same hole and tighten it up.  Remember catch fabric not cardboard.  Knot off at the end of the seam but do not cut the thread.


Square up the outside edges and put the back on your box  pin corners if you wish.....see around the outside edges.  Remember the unfluffed piece goes on the bottom.  Make sure the back will "read" correctly...right side up! 


Sew along the outside. Once complete knot off the thread and tunnel through the fabric so thread end will not show.


Clip thread as close as possible to fabric. 

Stuff box with plastic bag or fabric scraps....


Center and mount stitching to front padded board.  Repeat process but leave a scant 1/2 inch opening...not sewn..along  the bottom of the box.  Mark with tape as a visual reminder.


Sewing completed...use a skewer to pry open the hole and tuck one end of the cording inside.


Sew or glue cording around the sewn edge.  Let glue dry before trying to tuck in the other end
Tape and cut cord if it is too long but leave enough to tuck inside


The bow....fold in half and secure the middle by sewing it with the red thread.  On the last wrap add the tower charm


Knot off thread and fluff the loops of your bow.  Pin or glue to the top of box.  Remember all our wonderful French memories...I really need a lemon tart!  


Pyn Pillow will be posted on Saturday....until then,
Au revoir

Monday, February 27, 2017

Egg-actually Like the Model!!

Lizzie*Kate just released a cute new pattern called Chick Party.   This blog post will help you finish your little egg just like the model.

First go to her website lizziekate.com and print off the egg template.


After printing it gather up your supplies comic board, fabric quilt batting, trim and cording.


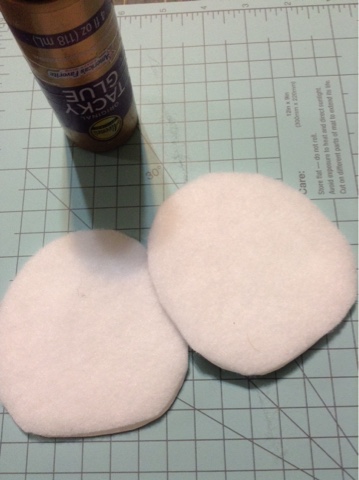
Cut two egg shapes from the comic board.  Mark the insides with an X


Now cover the two outsides with low loft quilt batting.  Trim flush with the edges.


Now take your backing fabric and trim it about 3/4 inch from the edge of the form


Start gluing fabric to the back of the template.  I like to do top, bottom, side, side first.  


Then gently gather and glue the sections between. If you get a fold lift it up and try again.  


Check to make sure everything is nice and smooth on the opposite side


Repeat with the stitched linen.....spend time getting centered and straight.  Us a few straight pins to keep it in place while gluing. 


We used Peony Ric Rack by Lady Dot.  Fold down the raw edge and then glue around the outside edge.


Once you make it around to the top, fold down the edge and then add the hanger.  I use twisted cord but jute, ribbon or nbaby Rick rack would also work.


Now give a good dose of glue on the bottom half of the Rick rack and along the inside edge.


Center stitching in top and use clips to make good contact along the edges.


Let dry....and your egg will looks egg-actually like the model....no yoke!


Wednesday, December 7, 2016

Lizzie*Kate Noel

Here is Linda's second Christmas pillow.  This one comes with the cute Santa needle Nannie....isn't he just darling???

Now that you have done the hard part...stitching, let's do the easy part finishing!

Interface the back of the stitching and both fabrics.  Now cut the linen leave one inch on top, bottom and right side.  Trim left side to 3/4 inch.


Baste Rick rack to the right side.


Sew the green star fabric strip along this same side.  Adjust your seam allowance so the hills of the trim are showing.

Trim green stars flush with the top and bottom of the linen. Then trim the width to 2.5 inches.

Now cut a 3 inch strip of the beautiful red snowflake fabric.  Make sure to cut along the 8.5 edge.  Strip should measure 8.5 by 3 inches.  Sew this to the bottom using a 1/2 inch seam allowance.  


Now take the remaining snowflakes and use it for the backing.  Linen and snow are wrong sides together and sew using 1/2 inch seam allowance. Leave three inch opening at bottom for turning.  Trim corners turn and stuff.  Tie your bow and attach it with a couple of stitches or carefully placed glue.  


You are ready for the holidays...!

Sunday, December 4, 2016

O Christmas Tree...Part Two!!!

Blogger and I are having a love hate relationship.....I am sure it is an "operator error"... Hopefully I can finish this up.

Ok. We have the trees along the bottom.  Clean up side and bottom seams so everything is nice and tidy.  Now with right sides together sew along the outside edges using a 1/2 inch seam. Leave a three inch opening at the bottom for turning.


Clip corners before turning. After turning stuff tightly using fiberfill and slip stitch opening shut.


The pillow is done and so is the post!  Hopefully tomorrow will be an easier post!  Stay tuned for Noel....loving that Needle Nannie!!!

O Christmas Tree. LIzzie Kate

Have you already stitched this cutie?  If so here are the directions to make your pillow look just like the model

Interface the back of the stitched linen and the cotton fabric.  This makes everything look and stuff better.

Cutting the linen is always scary but will help.  Measure out from the outermost stitch....cut one inch out on top and both sides.  Cut 3/4 inch on the bottom.


After cuts are made baste Rick rack along the bottom


Now cut a 1 1/4 inch strip of the green swirl fabric from the eight inch side.  The strip should be 1 1/4 inch by 8. Sew along the bottom...adjust seam so the "hills" of the Rick rack show.


Now is the time to add the beautiful trees!  Sew along the green swirls using a 1/2 inch seam.  


Tuesday, October 25, 2016

Put a Sock on it....The Mantle!

This is that exciting time of year...the push to find the perfect someone to finish a Christmas stocking.  That perfect someone can be YOU.

Here are a few simple steps to make a lovely stocking for your mantle.  This tutorial is especially geared for stockings without cutting guides.  

I like to interface the fabrics...stitching and linen.  I use a medium weight fusible interfacing on aida cloth.  


Now the shape...you can make a photo copy and practice on it until you get the desired shape or use an air erasable fabric marker.  That is what I us.  Decide who much fabric you want to show and mark the sides and bottom seam lines.  


Now for the tricky curves..use a circle template, roll of tape or eyeball what you want.  Remember you haven't cut anything so it can be changed. 


Once you are sure cut out the stocking....make sure to add the seam allowance!!!


Now use the front to cut out the lining....same size.  


Sew front of stocking to the backing fabric.  Right sides together....using the seam allowance you added!  Remember I said it was very important.


Trim backing flush with the front of stocking...clip seams around the curves.


Sew the lining...use same seam allowance as the stocking.  No need to turn right side out.  Just iron seam open at the top and turn down the same amount as the stocking top.


Slip lining inside stocking....use your favorite cording to cover the outside seam and form the hanger.


Hope Santa fills them with wonderful goodies!

The Pocket

Next comes the pocket....remember  your pocket can be any shape you want.  What we did is just a suggestion. Look at the template and you ...